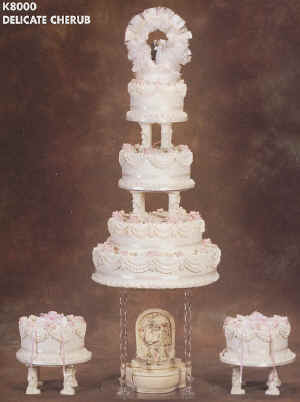
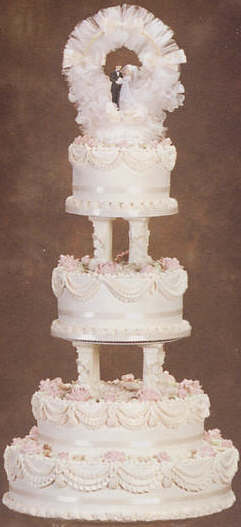
Wedding Cake Decorating
Everything you need to get to the top fast.
Each style has been designed for fast
and easy decorating while offering tasteful elegance.
Before you start:
Using your favorite recipes bake, fill and assemble a 16",
12", 9" and 6" cake plus two 8" satellite cakes.
Take the four 7" White Columns (included), and
using a saw or serrated knife, cut them down to the height of your 16"
cake. Also, take the eight 6" Support Legs and cut four of them down to the
height of your 9" and four of them down to the height of your 12" cakes. Then, tape 3 cake boards
together (one size for each tier) then wrap Picot Ribbon around the edge and
attach using a glue gun or tape.
16" Cake
Take the four 7" White Columns that you have already cut down to the
height of your 16" cake and attach them to a 12" tier plate. Carefully press the legs through the
16" cake, making four holes. Remove
the tier separator from the cake. Details.
Ice the cake.
Wrap Picot Ribbon around bottom of the cake.
On the top edge of the cake, divide and mark the cake into 12 sections.
You will need these markings later to pipe the drapes evenly.
For the bottom border, pipe a shell border with a #22 tip.
Using the marks that you have previously made, pipe a ruffle drape with a
#88 tip.
Then pipe a smaller drape inside of the large drape using tip #16.
Pipe a string drape over the large drape with a #16.
For the top border, pipe a reverse shell border with #16.
Take the tier plate and columns you used in step 1 and push through to
the bottom of the cake using the holes that you have previously made.
Pipe small roses and rosebuds with a #104 and leaves with a #67.
Pipe a shell teardrop between each drape with a #22.
Pipe a loop over each teardrop with a #16 as shown.
Take a 9" tier plate and attach four
of the 6" Support Legs that you already cut down to the height of
your 12" cake. Push the legs through to the
bottom of the 12" cake. Take out the plate and the legs. You now
have your holes marked for later.
Ice the cake.
Wrap Picot Ribbon around bottom of cake.
Divide and mark the cake edge into 12 sections.
For the bottom border, pipe a shell border with a #22.
Using the marks that you have previously made, pipe a shell
drape with a #16.
Then pipe a smaller drape inside of the large drape with a #16.
Pipe a string drape over the large drape with a #16.
Pipe a shell teardrop between each drape with a #22.
Pipe a loop at every intersection with a #16.
Pipe rosettes at the top of teardrops with a #16.
For the top border, pipe a reverse shell border with #16.
Take the tier plate that you used in step 1 and push it
through the holes that you have previously made. Pipe squiggles,
cornelli
lace or sotas over the 9" tier plate to cover it up. Now
take four of the included 4" Cupid Columns - Ivory and
attach them to the 9" tier plate that you have just pushed
into the cake. Then take another 9" tier plate and attach
it to the top of the Cupid Columns.
Pipe small roses and rosebuds with a #104 and leaves with a
#67 using the marks from step 4.